

QReserve Academy
Invoices and Quotes
The Invoices module allows you to generate invoices and quotes with just a few clicks. Easily bill based on reservations, actual usage logs, service requests, or other ad-hoc items. Quotes and invoices can also be generated based on projects, users, supervisors, and resources with all items automatically gathered based on your specified time period.
Set location to show on invoices
Before getting started, you should set a location and a default currency to appear on the invoices and quotes associated with the site. To do so, under Site Settings, click on the Location tab and fill in the fields Address to Show on Invoices and Primary Currency.
View all invoices and quotes
From your site's Administration view, click on Invoices on the left-hand sidebar. You will be brought to the Invoices and Quotes page where a table displays all invoices and quotes with a summary of their essential information:
- Number
- Type (i.e. Invoice or Quote)
- Status (Draft, Sent, Paid, Void)
- Date (Editable)
- Due / Expiry Date
- Bill to (user name and account number)
- Total
Set tax rates
From the Invoices and Quotes page, select Edit Tax Rates. In the window that pops up, click Create New Tax Rate. The following fields can be attributed to a tax rate:
- Code (Shown on invoices)
- Name (Internal use)
- Rate (%)
- Tax Note
You can choose to designate one of your rates as the default tax rate by selecting Make default in the table of your created tax rates. Doing so will automatically apply this rate to new invoice items. When creating a specific invoice or quote, it remains possible to remove the default tax rate for any number of items if desired.
Tax calculation option
By default, tax amounts are calculated by first summing the subtotal of each invoice line item and then applying the tax rate to this subtotal. Alternatively, there is the option in the bottom summary section of each invoice (and a site-wide default in Site Settings) to calculate and round tax on a per item basis. For many invoices this setting will make no difference but in some cases it can change the amount of tax charged and the resulting total amount.
The difference of each is demonstrated below:
Standard Tax Calculation
| Item 1 | $42.26 plus 13% tax |
|---|---|
| Item 2 | $42.26 plus 13% tax |
| Subtotal | $84.52 |
| Tax | $84.52 x 13% = $10.9876 which rounds to $10.99 |
| Total | $84.52 + $10.99 = $95.51 |
Per Item Tax Calculation
| Item 1 | $42.26 plus 13% tax |
|---|---|
| Item 2 | $42.26 plus 13% tax |
| Item 1 Tax | $42.26 at 13% = $5.4938 which rounds to $5.49 |
| Item 2 Tax | $42.26 at 13% = $5.4938 which rounds to $5.49 |
| Subtotal | $84.52 |
| Tax | $5.49 + $5.49 = $10.98 |
| Total | $84.52 + $10.98 = $95.50 |
Create a Quote / Invoice
From the Invoices and Quotes page, select + Create Invoice or + Create Quote. The following page reflects the structure of the final invoice / quote and allows you to fill in information that they wish to be reflected therein.
In the top portion of the page, the available fields to fill in are:
- Bill To User
- Bill To Email
- Bill to Name
If the intended recipient is a user of the site, their name (and email address) will appear from the drop-down list under Bill To User when you click on the field "Select User". Selecting a user from the drop-down list will pre-populate the fields Bill To Email, Bill To Name and Billing Account (if the user in question has designated an Account Number in their settings).
- Billing Account
- Bill To Address (it is possible to save an address to a specific user, if desired)
- Number (by default, the first invoice created is attributed the number 1 and subsequent invoices are numbered in sequence; however this can be overridden to any arbitrary string of characters)
- Date
- Purchase Order
- Due Date
- Status (draft, sent, paid, void).
"Draft", "Paid", or "Void" invoices include a watermark specifying the respective status.
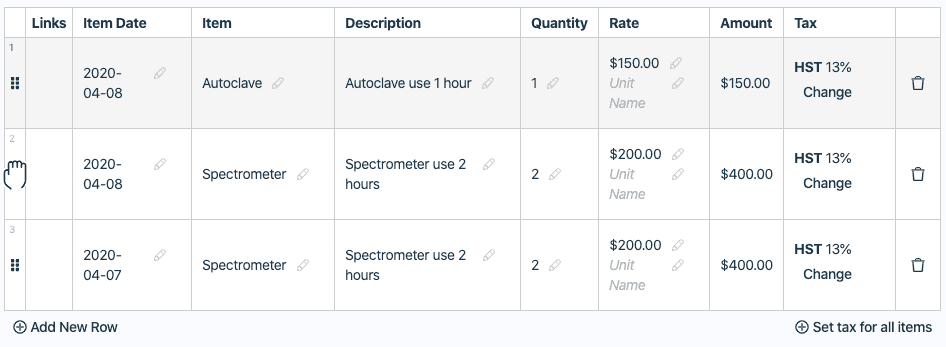
In the table on the bottom of the page, administrators can fill in the following information for every billable item:
- Item Date
- Item (name)
- Description
- Quantity
- Rate (a unit name can also be added)
- Amount (automatically calculated based on the Quantity and Rate)
- Tax
Any default tax rate will automatically be applied to all items. This can be changed for an individual item by clicking on Change under the Tax column of the item in question. Alternatively, a tax rate can be set for all items by clicking on + Set tax for all items.
To add additional billable items, click +Add New Row below the table on the left-hand side of the page.
At the bottom of the page, the subtotal, tax and total amount are automatically calculated based on the information provided in the above table.
Optionally, administrators can include additional information at the bottom of the page under the fields Memo and Payment Instructions.
Change order of items
The number and order of billable items in your invoice/quote is indicated in the left-most cell of the table in the bottom half of the page. To modify the order of items, click on the icon in the left-most cell and drag the item to the desired position.
Invoice Number Prefix
Invoice and quote numbers are automatically generate using an algorithm to predict the next, logical, invoice number given the format of the previously set or generated invoice number. This makes it impossible to distinguish a user based on the invoice number alone. To solve this, each user can have a unique Invoice Number Prefix string set in Administration that is automatically prepended to the front of invoice numbers. Find this setting on the Identifiers and Records column of a user's settings window.
Linking reservations to invoices
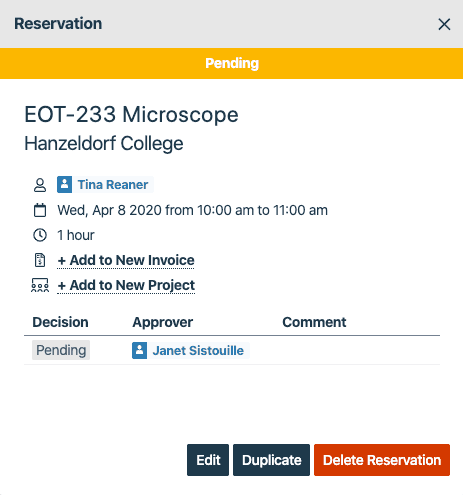
Add a reservation to a new invoice from the resource calendar
Quickly create a new quote or invoice with automatically populated user and billing information by linking the reservation request from the site's resource calendar. From the reservation calendar, select the reservation in question and click + Add to New Invoice. You will be brought to the new Invoice page, where relevant fields related to the reservation will be pre-populated and the remaining fields can optionally be filled in.
Add multiple reservations to an invoice
Our Invoice Creation Wizard allows administrators to easily create a single invoice for a user with multiple outstanding billable reservations. From your site's Administration view, click on Reports, then Activity in the left-hand sidebar. Search with the available filters to narrow down the reservations that you wish to add to a new invoice. When the search results reflect the reservations for which an invoice must be created, click Create Invoices in the top right-hand corner of the page.
You will be brought to the Invoice Creation Wizard. This wizard will automatically create invoices from the currently filtered reservations. Invoices will be created with DRAFT statuses and, thus, should be reviewed as required prior to sending.
Reservations can be grouped on the invoice in one of three ways:
- Supervisor/user* and billing account
- Supervisor/user* with combined billing accounts
- All reservations together
- When a user is not assigned a supervisor, that user is considered their own supervisor for grouping purposes.
Activate/deactivate the option "Skip reservations linked to existing invoices" as required.
Finish by clicking on Create <num> Invoice(s). You will then be brought to the Invoices and Quotes page, where the newly created invoice(s) will be listed at the top of the table.
Creating invoices for projects
Administrators can easily create invoices related to specific projects. From the dashboard of your project, click Create Invoice in the top right-hand corner of the page. In the new pop-up window, you will be given two choices:
- Add all non-invoiced reservations and requests
- Create a blank invoice linked to this project
If the first choice is selected, you will be brought to the new Invoice page, which will be pre-populated with the linked reservations and the relevant user information. The remaining fields of the invoice must be filled out by an administrator as required.
View invoices linked to reservations
When a reservation has been linked to an invoice, the reservation will reflect the invoice number with which it is associated and link to that invoice. In the example below, the reservation is linked to invoice #7. By clicking on #7, the administrator will be brought to the corresponding invoice page.
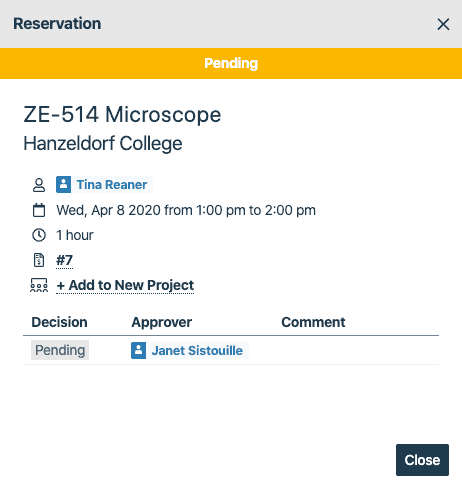
From the "Invoice" or "Quote" page, click on the calendar icon under the Links column in the table of billable items to be brought to that reservation's information.

Send or download invoices and quotes
Invoices and quotes can be easily sent by email or downloaded in PDFs to share with your clients directly from QReserve. From the relevant Invoice or Quote page, administrators can choose one of the following options in the middle of the page, beside the Save invoice button:
- Download PDF
- Share Link (This is a publicly accessible link where recipients are able to view invoice information and a PDF copy of the invoice. Any changes you make to this invoice will automatically be reflected at this URL)
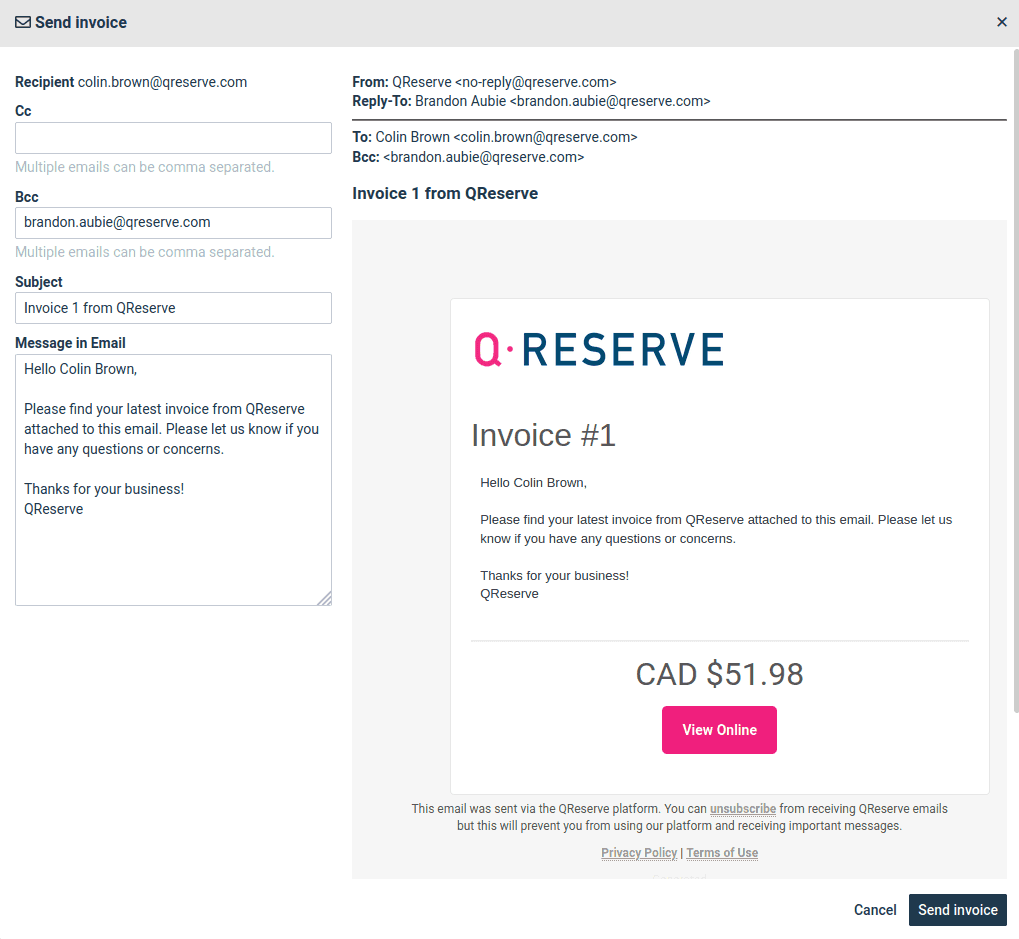
- Send invoice (Administrators are provided with a modifiable template addressed to the recipient, prefilled with a subject and message including a link to the invoice).
All changes must first be saved by clicking on Save Invoice in order to perform any of the following actions.
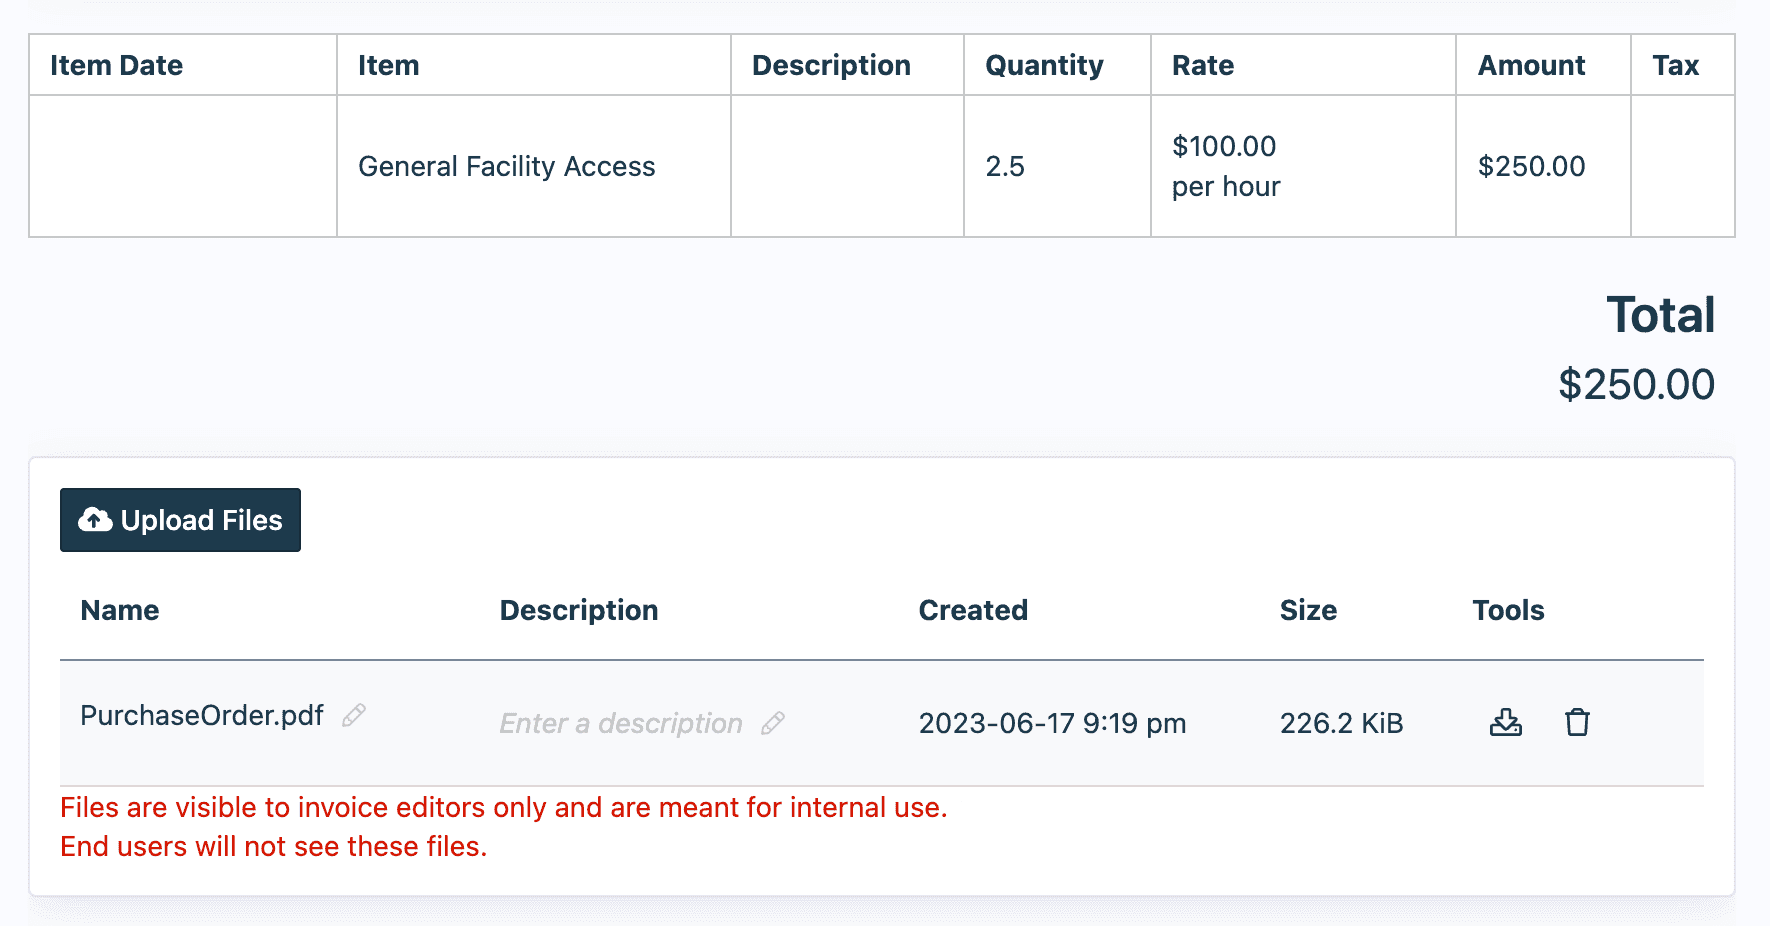
Attach Files to an Invoice or Quote
Files can be attached to invoices and quotes to keep relevant documents like purchase orders or contracts easily accessible to those with permission to edit an invoice. Attached files are not accessible to a user who receives an invoice unless they have permission to edit the invoice. In other words, file attachments are for internal use only and are not meant to be shared with invoice receivers.
Copy an Invoice or Quote
Quotes can easily be copied to a new invoice or vice versa. From either the "Create Invoice" or "Create Quote" pages, simply click the "Copy to Quote" or "Copy to Invoice" buttons in the top right-hand corner of the page, respectively.
An invoice can also be copied to a new invoice by clicking the "Copy Invoice" button in the top right-hand corner of the page (likewise for quotes). In doing so, all of the data in the current invoice will be copied, except for the "Number" field, which will advance by one.