QReserve Academy
Check-In and Check-Out
Track actual usage by enabling check-in/out functionality. Users can check into and out of reservations from their dashboard, confirmation email, or kiosks with touch or contactless QR Codes!
Check In and Out from Kiosks
How It Works
Using kiosks, users can check in/out in two different ways:
- by clicking the kiosk Check-In and Check-Out button
- by scanning their QR Code on the Kiosk camera, or
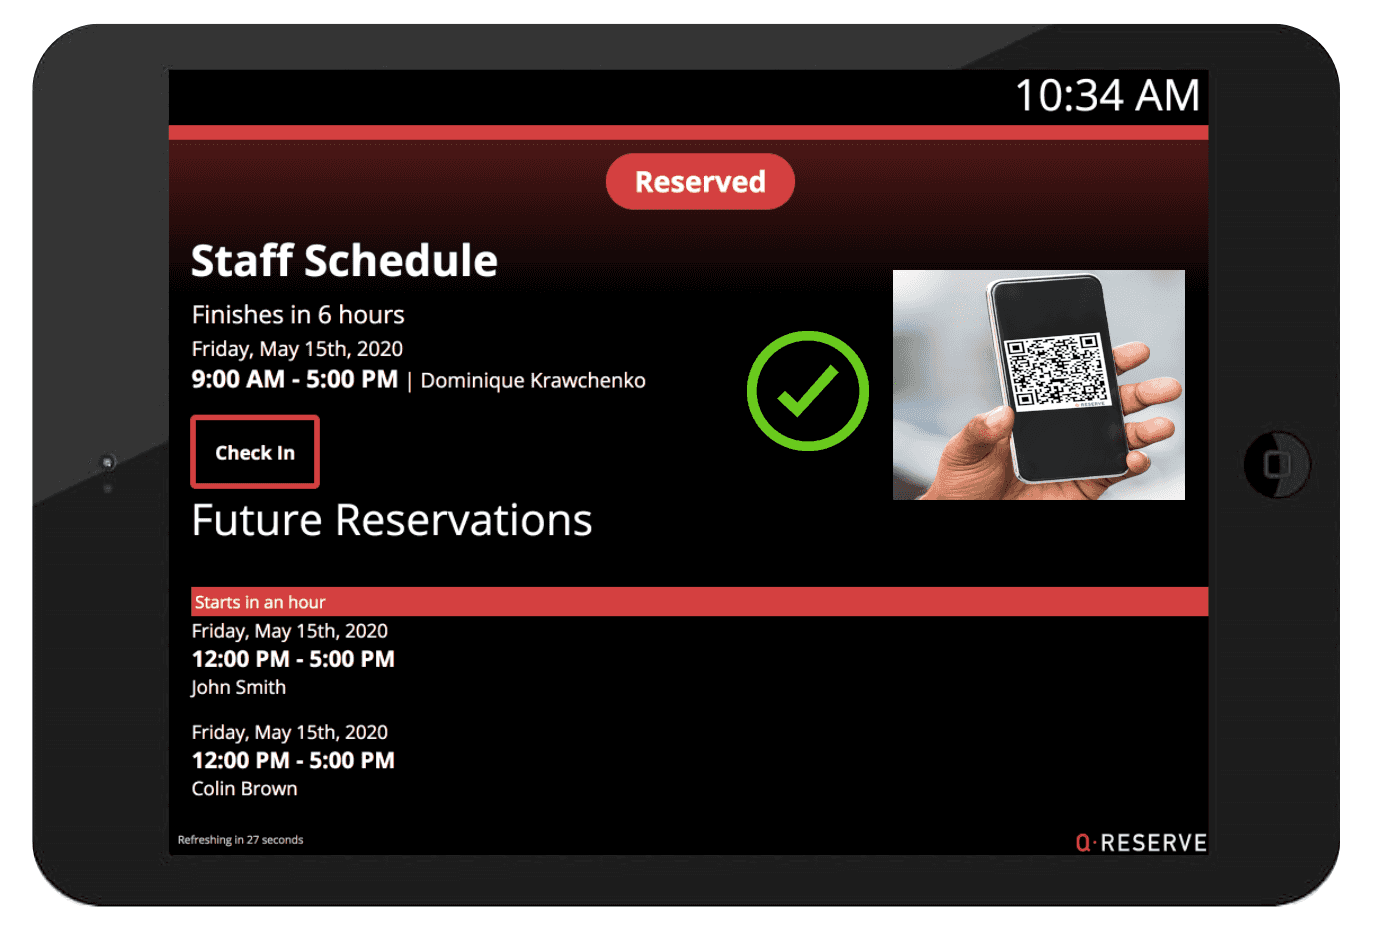
1) On Kiosk Check-In and Check-Out button: every reservation displayed on the kiosk has a Check-In button that can be clicked up to 10 minutes before the reservation starts or ends. For example, if you have a reservation from 9:00 am-10:00 am, you can click the Check-In button anytime between 8:50 am and 10:00 am. When they are done with their reservation, users can click the Check-Out button to record their actual usage end time.
If desired, administrators can require users to authenticate their check-in/out with their personal PIN.
2) QR Code Check-In/Out: for kiosks with cameras, users can check-in/out by scanning their personal QR Code. Simply hold your QR Code to the camera to scan.
Users can find their personal QR Code under My Memberships on their site profile page. Users belonging to multiple sites will have a unique QR Code for each site membership.
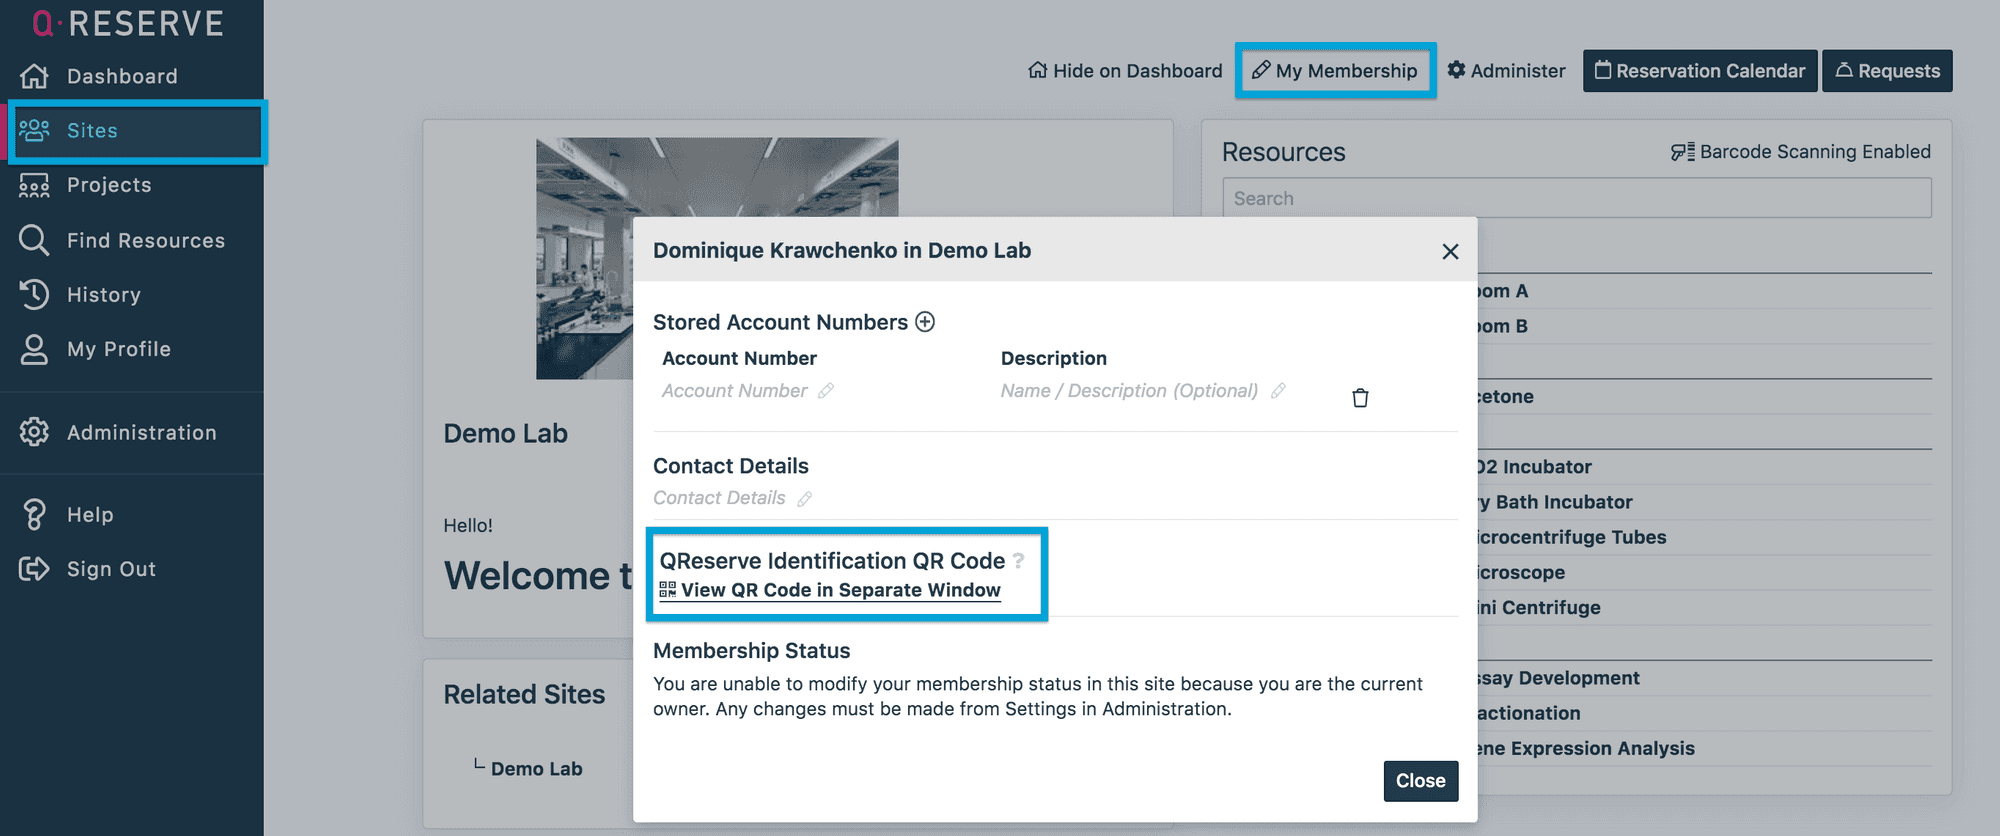
If distributing QR Codes to users in bulk, administrators can download all of their user QR Codes from the Users tab by clicking QR Code Sheets. Administrators can also access user QR Codes individually through the user edit modal. Simply click the user name or the pencil icon next to the user name in the Users tab.

Including QR Codes in Confirmation Emails
You can automatically include a user's QR code in each confirmation email by enable this option in your Site Settings under the Reservation Email options card on the Users & Reservations tab. This makes it easy to present a QR code upon arrival to check in.

How To Enable Kiosk Check-In/Out
To enable kiosk check-in, ensure the On Kiosk Check-in and if desired, QRCode Check-In toggles are enabled in Kiosks.

Check In and Out from the QReserve application and Emails
How It Works
Users can check in/out via their QReserve dashboard and reservation confirmation emails. If enabled, each reservation confirmation email will include a Check In Or Out Now button that can be clicked up to 10 minutes before the reservation starts.
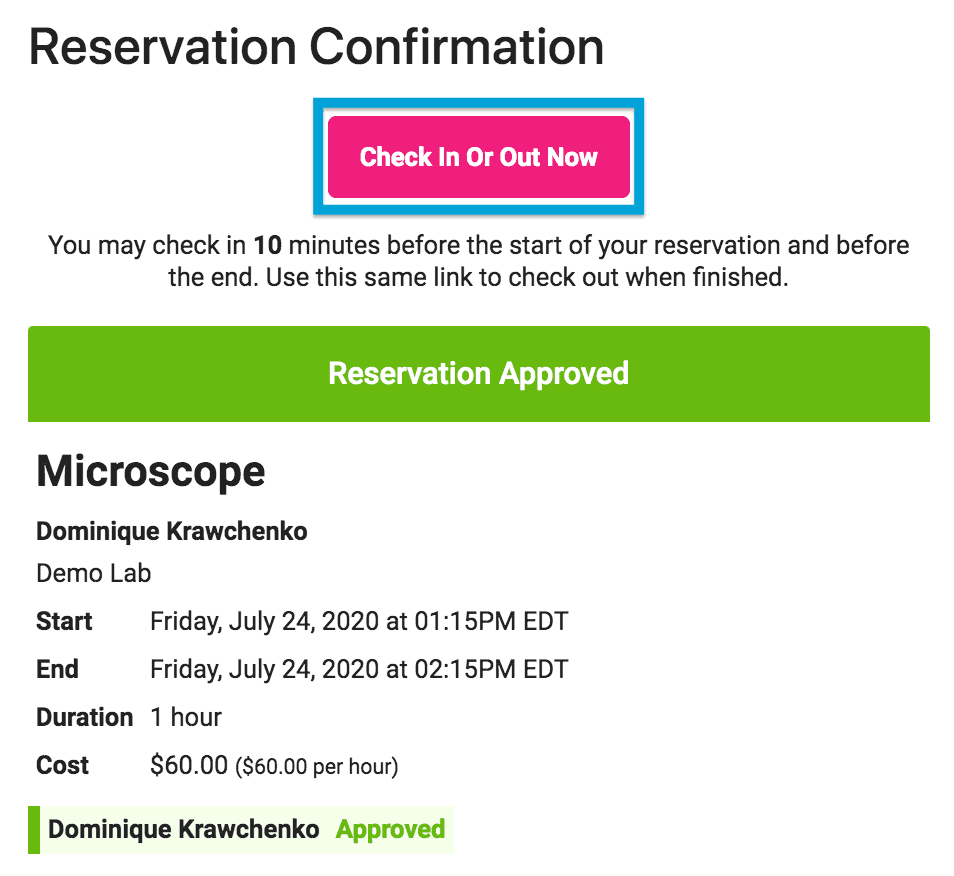
The default email notification setting is to send the reservation confirmation email with the Check In Or Out Now button at the time the reservation is made. Users can opt-in to receive reminder emails prior to their reservation. To set a default reminder email parameter, click the Reminder field in the reservation checkout box.

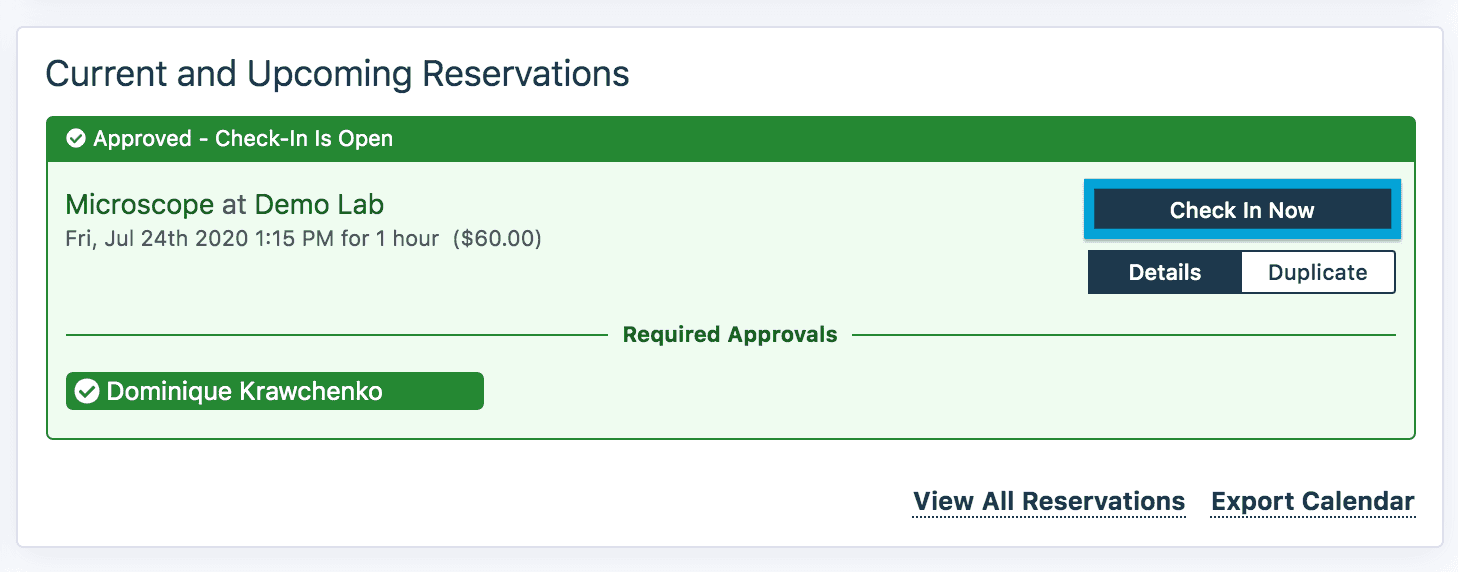
Users can also check-in/out directly from their QReserve dashboard. Under Current and Upcoming Reservations, users can click the Check Into Now button up to 10 minutes before their reservation starts.
How To Enable Dashboard and Email Check-In/Out
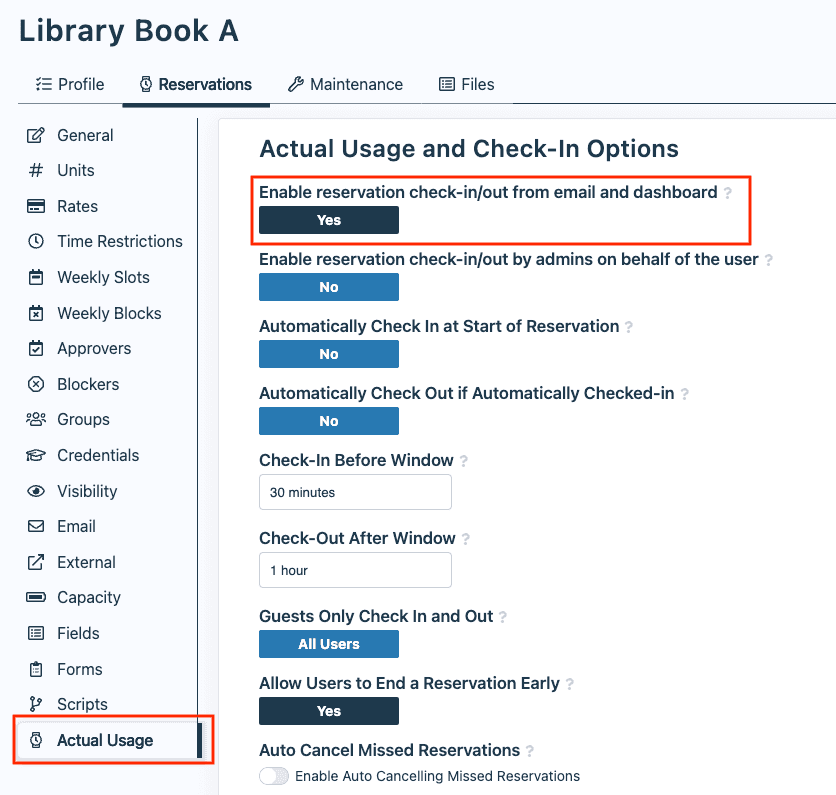
To enable the email and dashboard Check-In/Out button, visit Reservations > Actual Usage > Enable users to check-in and -out for reservations.
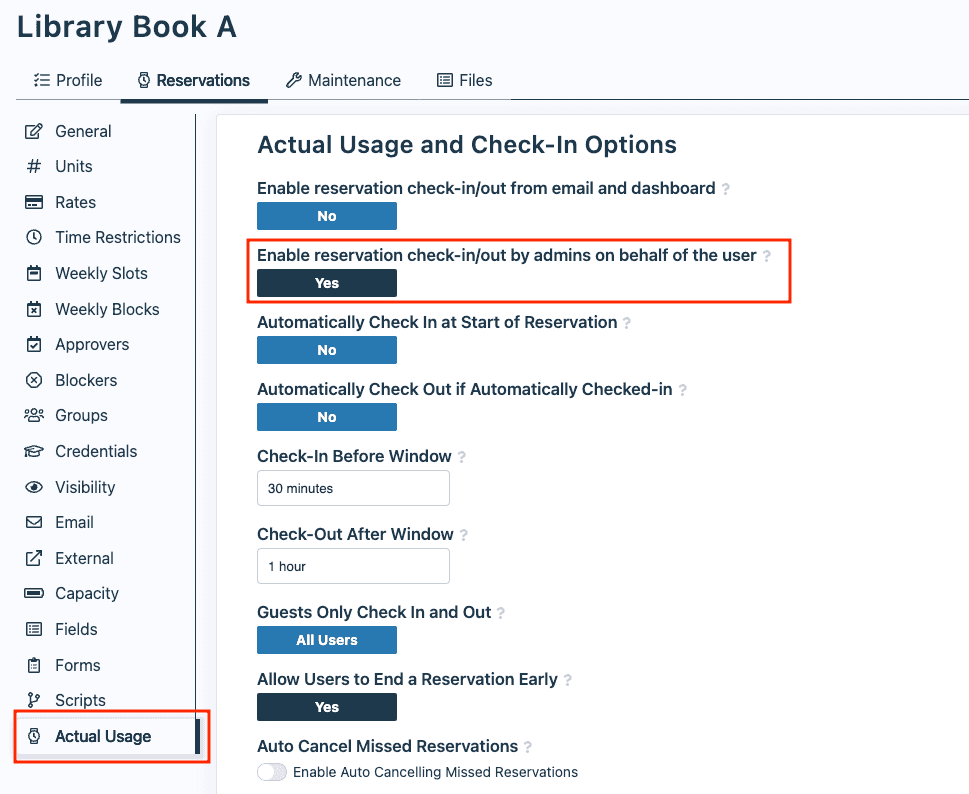
Enabling Administrator Check-In/Out
In some scenarios you may want to check into and out of reservations on behalf of your users. For example, if a user reserves a piece of equipment but you want to mark when it was picked up, you can use the Administrator Check In/Out option for this that lets you check a user into their booking when viewing their reservation. Typically, either the user facing or admin facing option is enabled but, if desired, both can be enabled at the same time.
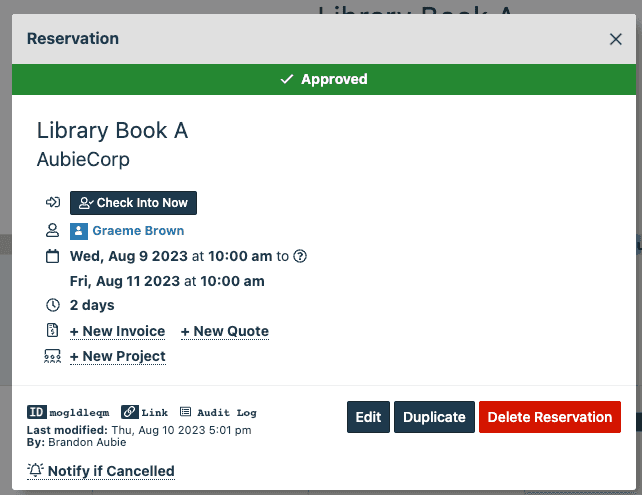
Once enabled on a resource, a site administrator can check into the reservation on behalf of the user by viewing the reservation in the QReserve application.
Automatically Checking In and Out
You can configure a resource to automatically check into reservations at the start. By default, a reservation will automatically check out at the end of a reservation but this can be configured with the Auto Checkout Delay option to automatically check out after a period of time from the end of a reservation or to disable automatic check-out entirely.
Allowing Reservations to End Early
If administrators have enabled check-out and have also enabled the option to end a reservation early then a user will be asked to select from the following options:
- Check out but leave reservation unchanged.
- Check out and change reservations times to end now.
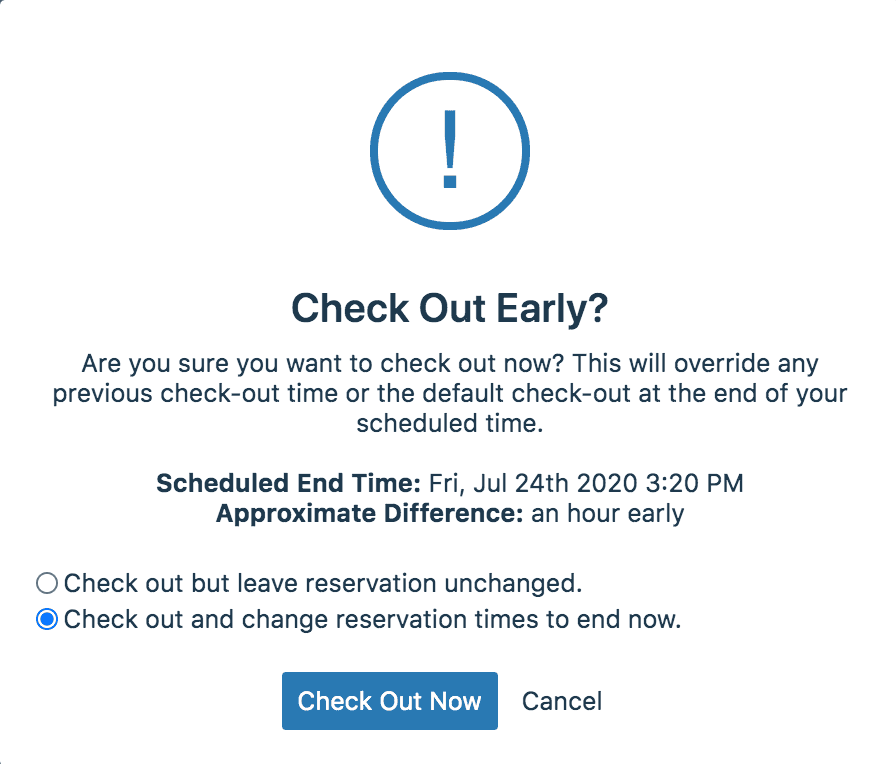
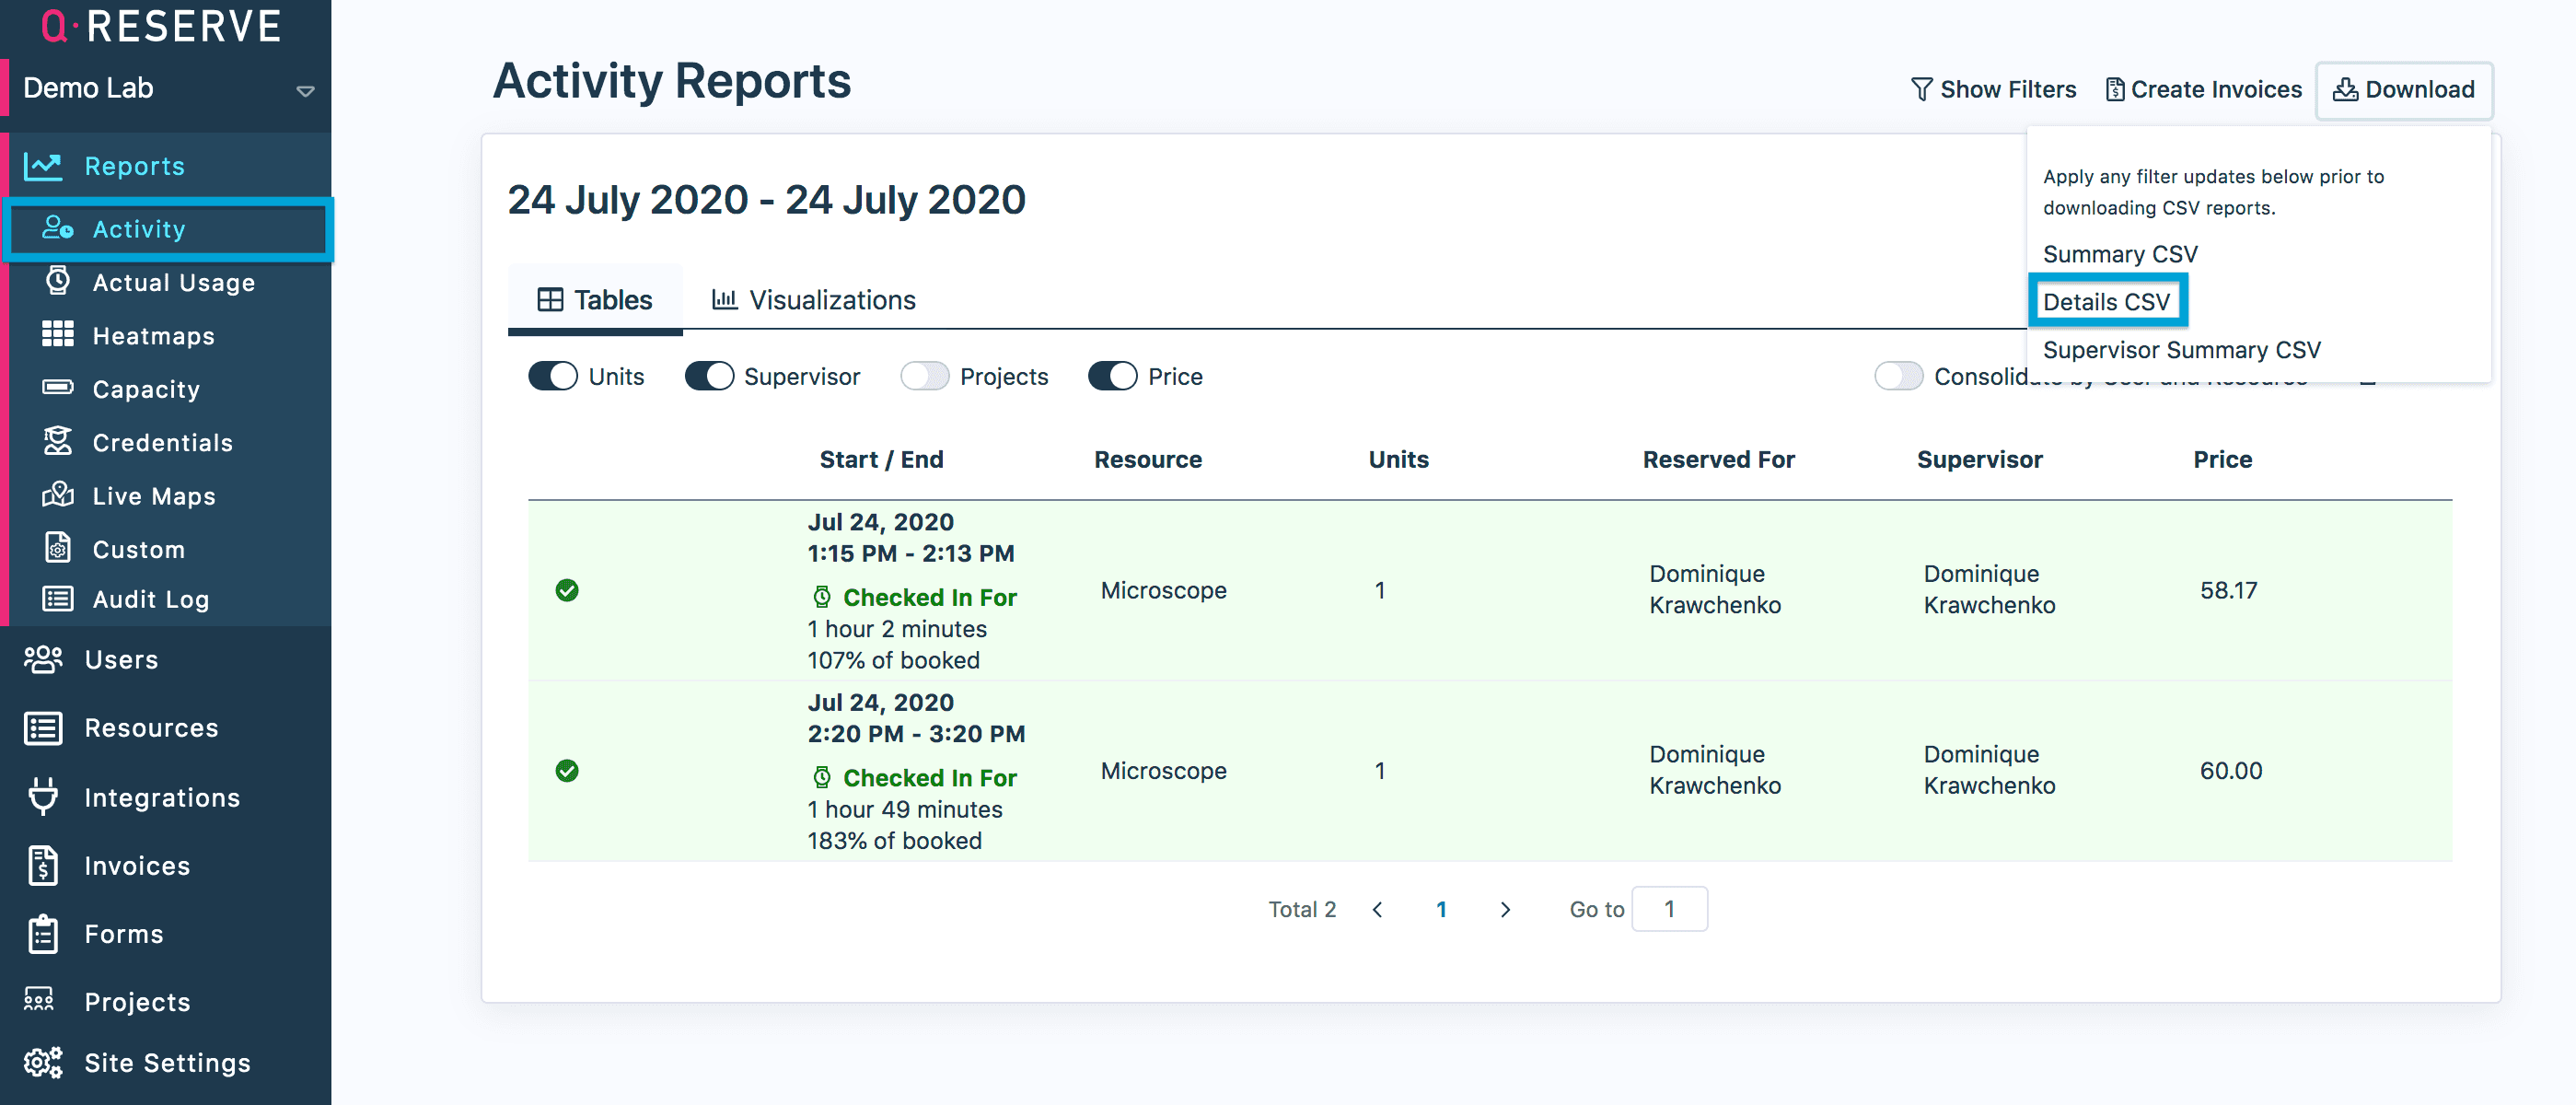
If a user selects Check out and change reservation times to end now, the reservation will immediately and and the resource will become available on the calendar. The Activity report will override the reservation end time with the actual check-out time. Administrators can view the original reservation start and end time by downloading the Details CSV report.
If a user selects Check out but leave reservation unchanged, the Activity report will record the end time as the original reservation end time. If a user decides to leave the reservation unchanged, they will have the option to check out again. The Check-out again button will remain an option for the user until A) the reservation has ended or B) the user selects check-out and changes the reservation time to end now.
Note: In order to check-out, users must wait 5 minutes after checking in. Users will receive the following message if they attempt to log out within the first 5 minutes of their reservation.

Automatically Cancelling Missed Reservations
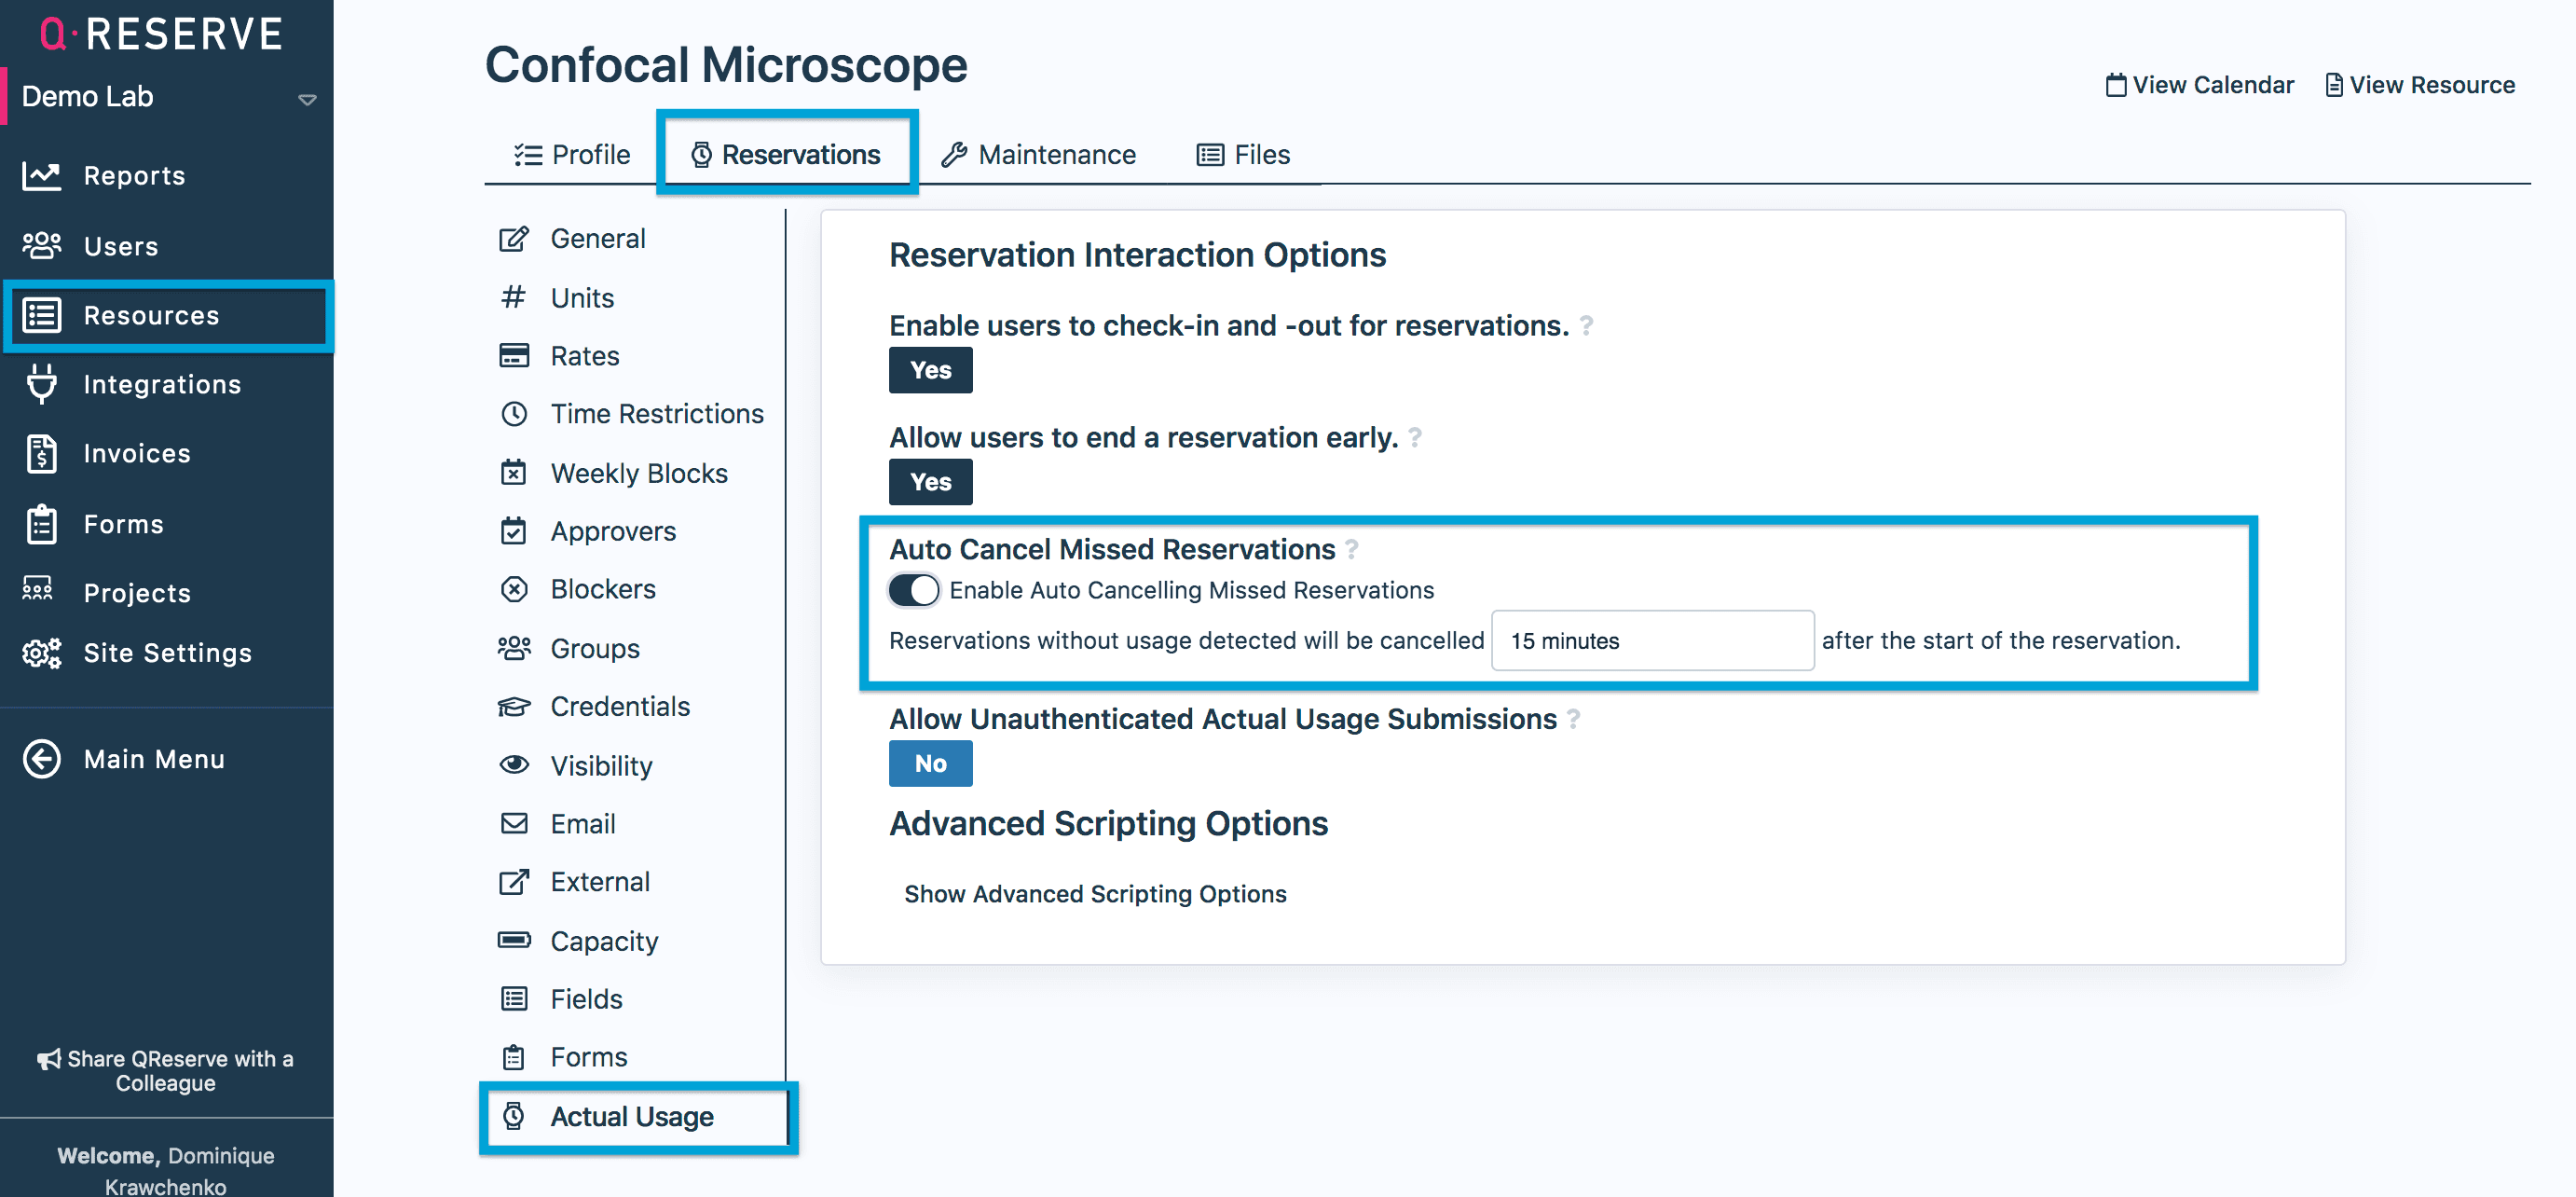
Administrators can set parameters to auto-cancel reservations within a custom time frame if users fail to check-in. This is a resource level parameter that can be enabled under Reservations > Actual Usage > Auto Cancel Missed Reservations.
Users will receive email notifications for their missed and cancelled reservations.
Reporting
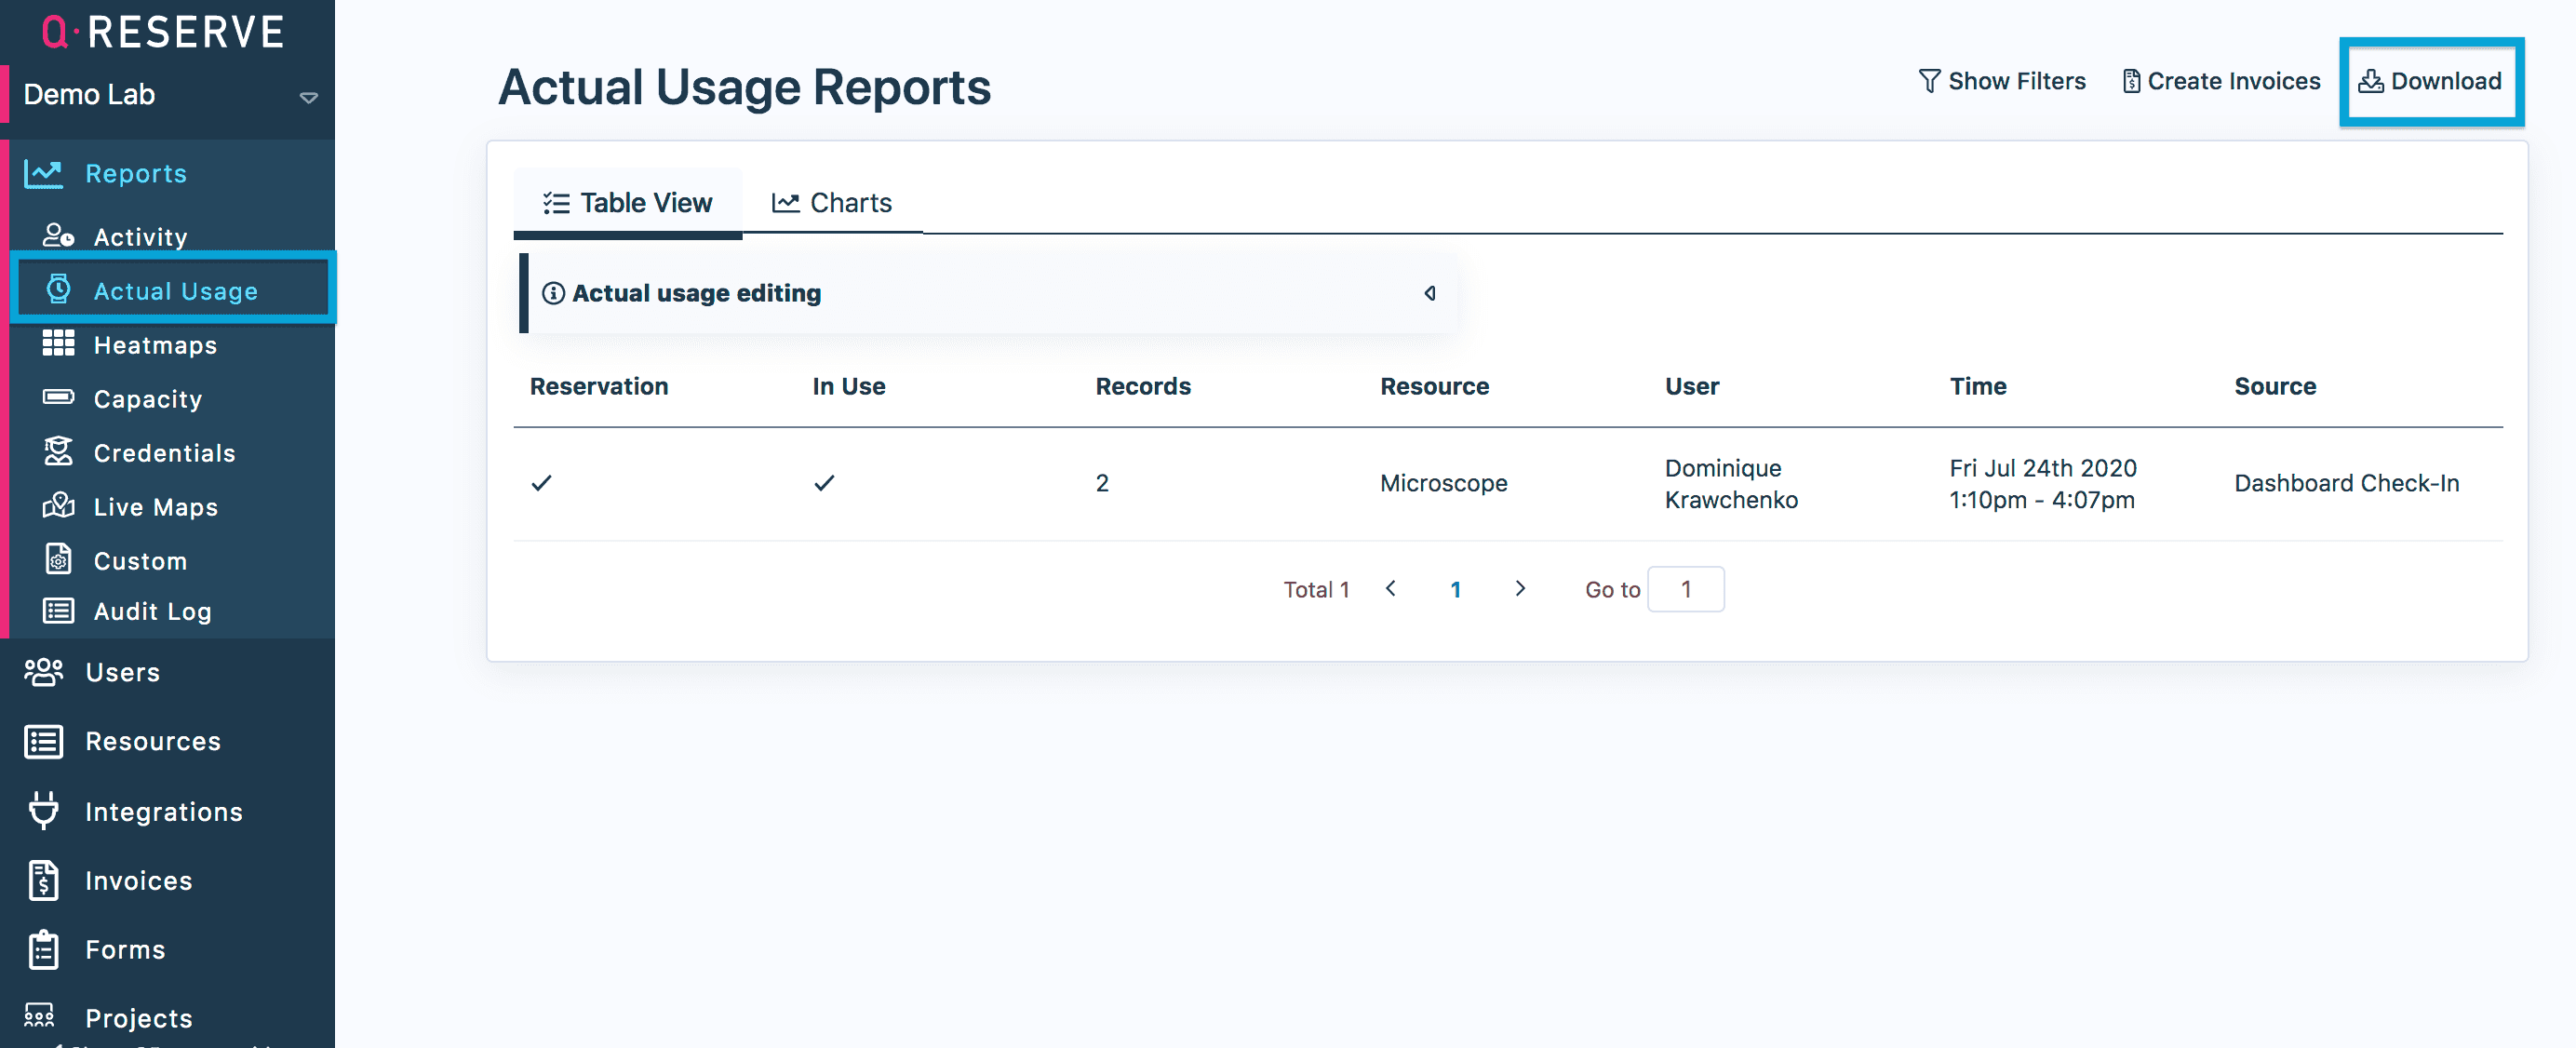
Reservation start, end, check-in and check-out times can be found in the Activity Report, Details CSV report and/or Actual Usage Report.
If a user ends a reservation early, the Activity Report will show the new end time but the original end time is still available in the Details CSV report and for invoicing.
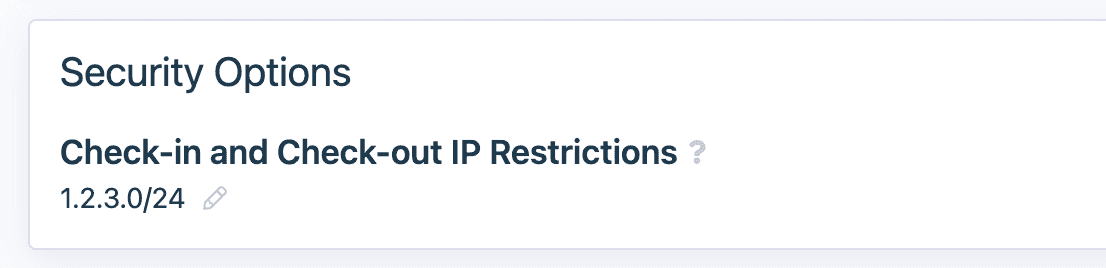
IP Restrictions
You can require that users check-in and check-out from reservations from a specific IP, list of IPs, or subnet. Users checking in from their email, dashboard, or kiosks will be required to use a device that meets your IP restrictions.
IP restrictions must be configured on a site-wide basis in Site Settings in the Access & Security section.